Huggie Hoops Should Clear Your Lobe, Not Press Into It
Inner diameter tells only part of the fit story. Map the hoop’s thickness and your piercing placement on paper to see whether the clasp will close without pinching.
October 29, 2026 · 7 min read
The useful measurement on a huggie hoop is the empty space inside it. That space has to accommodate the skin below your piercing before the hinged post can meet its latch. If it cannot, the hoop may still click shut, but the lower curve will press into the lobe.
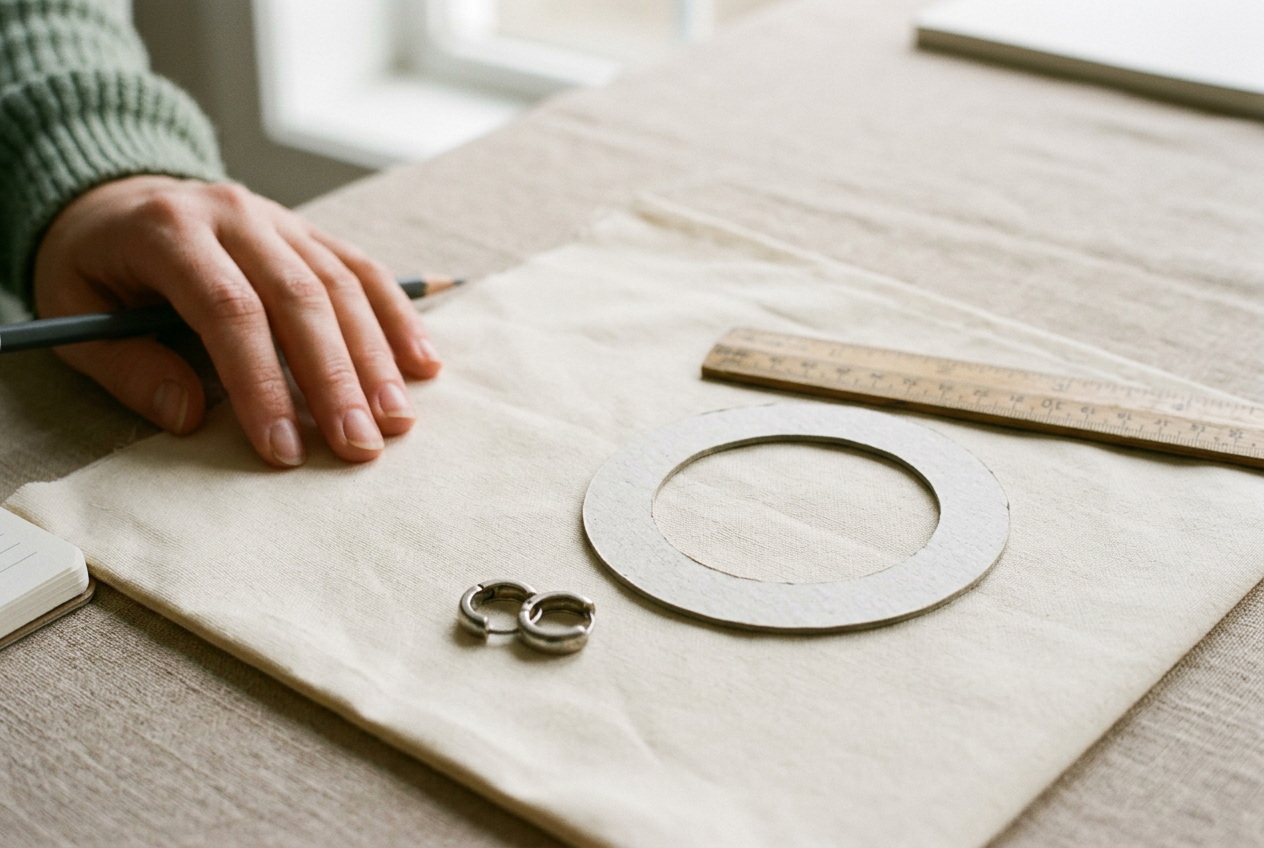
An 8 mm inner-diameter paper ring with a 2 mm-thick band is the working example here. It is not tied to a particular product. It represents the kind of compact huggie that can look neat in a product photograph while fitting very differently across two ears, including two ears belonging to the same person.
This is unisex sizing advice. Earlobe depth, piercing position and channel angle determine the result, not the department in which the earring is sold.
Start with the empty space, not the outside edge
Inner diameter means the straight distance across the open interior of the hoop. For a hinged huggie, that measurement is usually taken across the widest part of the internal circle, although retailers do not all label their diagrams the same way.
Outer diameter includes the metal. A hoop with an 8 mm inner diameter and a uniform 2 mm band has an outer diameter of about 12 mm: 8 mm of open space, plus 2 mm of metal on each side. That outer measurement describes scale on the ear. It does not tell you how much lobe fits inside.
This distinction matters most when a listing gives one bare number. An “8 mm hoop” could mean 8 mm inside or 8 mm outside. If 8 mm is the outer diameter and the band is 2 mm thick, only about 4 mm remains inside, which is too tight for many standard lobe placements. Do not infer the missing measurement from a model photograph.
Ask the seller or choose a listing with a dimensioned drawing.
The body thickness is also separate from post thickness. The post is the narrow section that passes through the piercing; its gauge, meaning the post’s diameter, must suit the existing piercing channel. A sculptural 2 mm hoop body can still have a much finer post.
Measure the lobe drop in a straight line
Use a millimeter ruler and good light. Stand in front of a mirror, then measure from the center of the piercing opening down to the lowest edge of the lobe. Keep the ruler vertical rather than following the curve of the skin. A flexible tape laid along the lobe records surface distance and can make the required hoop look larger than it needs to be.
Measure both ears. Piercings that look level from the front can sit at different heights, and a difference too small to notice in studs becomes obvious when one huggie floats and the other rests on skin. Shop for the ear that needs more room if you want a matched pair.
That lobe-drop number is the minimum interior depth, not the buying target. A 7 mm drop inside an 8 mm hoop leaves about 1 mm between the lobe edge and the metal in the simplified paper model. The gap may change once a real post follows the angle of the piercing, but the calculation tells you whether the size is plausible.
Close does not mean comfortable. If the lobe fills the full interior on paper, the real hoop has no allowance for normal movement, a slightly angled channel or small changes in the tissue over the day. The clasp may close. The underside may still leave a groove.
Make the 8 mm paper huggie
Draw an 8 mm circle on plain paper using a circle template or compass. This is the inner opening. Draw a second circle around it with a 12 mm diameter, which represents the outer edge of a hoop with a 2 mm uniform band.
Cut around the outer circle, then pierce and remove the inner circle so that you have a small paper ring. Make one straight cut through the ring at the 12 o’clock position. The cut marks the approximate top of the hoop, where a hinged huggie’s post and catch sit.
Mark the top edge of the inner opening. Hold that mark beside the center of the piercing while looking straight into a mirror, with the ring lying flat against the front of the lobe. The inner bottom edge should pass below the lobe without covering it. Look for a visible line of daylight or paper-free space between skin and the lower curve.
The template should not be threaded through the piercing. It is a scale drawing, not a wearable sample, and paper fibers do not belong in the channel. Tape it to the end of a cotton swab if your fingers obscure the small gap.
Now repeat the drawing for the next listed size rather than shifting the first ring downward to make it look roomier. If a seller offers 8 mm and 10 mm inner diameters, those need separate templates aligned at the same piercing point. The difference on the page looks minor. On a small hoop, 2 mm can change the fit from pressed to visibly loose.
Our 8 mm paper huggie passes the first test only when the lobe ends above the bottom of its inner window. If skin overlaps that window, no metal finish, hinge design or sale price can correct the basic size mismatch. Move up in inner diameter.
Use the product image to correct the template
The paper ring assumes a regular circular hoop with the post crossing near the top of the interior. Real huggies can be oval, squared or thicker at the front, and the hinge may sit higher or lower than the simplified cut in the template.
A side-view product diagram is more useful than a styled ear shot. Scale the image until its stated inner diameter matches the same measurement on your screen or printout, then trace the outer profile, post and hinge onto paper. This version reveals whether a bulky catch occupies space that the headline diameter appears to leave open.
Piercing angle remains the part paper cannot settle. A channel that tilts upward or downward changes where the hoop hangs, while a thick lobe can make the post meet the catch at a slight angle. If the template leaves only a hairline gap and the seller does not show the wearable post length, the fit is still a gamble.
A hinged clicker, meaning a hoop whose post locks into an integrated catch, should close without the wearer pulling down on the lobe. Tension is not a sign of a secure fit. It means the hoop is using soft tissue to gain the fraction of space the clasp lacks.
Hoop thickness changes the look and the calculation
Thickness matters differently depending on which diameter the seller provides. With a confirmed inner diameter, a thicker band grows outward and looks bolder without taking away the stated interior room. With a confirmed outer diameter, thicker metal reduces the opening and moves the lower inside edge closer to the lobe.
Return to the 8 mm inner-diameter template. A 1 mm band produces a 10 mm outer diameter, while the 2 mm band produces a 12 mm outer diameter. Both preserve the same simplified lobe clearance, but the second hoop occupies more visual space and may feel heavier or broader against the front and back of the ear.
Construction can complicate that neat geometry. Hollow gold tubing keeps a thicker hoop lighter than the same form in solid metal, while solid gold and implant-grade titanium offer different weights and price levels. Material does not rescue a poor diameter. Pay for the metal after confirming the fit.
Decide how close you want the hoop to sit
A true huggie fit leaves a narrow, visible gap. It follows the lobe without using it as part of the closure mechanism. That small clearance also gives the lower curve room to move when the earring shifts during dressing or sleep.
For a closer fashion fit, choose the smallest template that clears the lobe on both ears and still leaves the clasp position believable. For easier all-day wear, choose the next size when the smaller template nearly touches or when the piercing sits low. The larger hoop will read less like a sealed cuff, but comfort is the useful tradeoff.
Sleep-friendly jewelry should avoid projecting posts and sharp catches, yet a smooth profile does not make a tight huggie suitable overnight. Pressure from the lower curve can persist against a pillow even when the hinge itself never snags. Remove the hoop if it leaves a groove, feels warm or becomes tender, and do not use this sizing exercise to change jewelry in a fresh or unsettled piercing.
The paper test also prevents an unnecessary upgrade. There is little value in paying more for solid gold, stones or a polished hidden hinge when the listed inner diameter already fails the lobe measurement. Confirm the cheaper geometry first. Then choose the material and finish you want to wear daily.
Questions people ask
What inner diameter should a huggie hoop have?
There is no universal best diameter. Measure from the center of your piercing to the bottom edge of the lobe, then choose an inner diameter that exceeds that drop and shows a narrow gap on a paper template. Low piercings and fuller lobes need more room than high placements.
Does hoop thickness make a huggie fit tighter?
It does when the seller gives only the outer diameter, because thicker metal leaves less open space inside that fixed measurement. If the inner diameter is confirmed, added thickness usually expands outward instead. Check whether the catch or hinge intrudes into the opening, since a headline dimension may not show that obstruction.
Can I sleep in huggie hoops?
A smooth hinged huggie can be sleep-friendly when it clears the lobe, closes without tension and has no exposed post. A close silhouette alone is not enough. If the lower curve presses into skin or leaves an indentation after ordinary wear, it is too tight for overnight use.
Will a paper template guarantee that the clasp closes?
No. It checks scale and basic lobe clearance, but it cannot reproduce piercing angle, lobe thickness, post length or the exact hinge position. Treat a near-touching template as a reason to size up, and favor a seller with clear measurements and a workable return policy.
One update a day
Today's fashion update, in your inbox
One fashion update each morning — no hype, no filler, just pieces worth wearing.